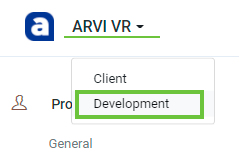
To manage games and their versions, you should switch to Development Mode. In the upper left corner of the page in your personal account, from the ARVI VR drop-down menu, select Development.
Creating game description
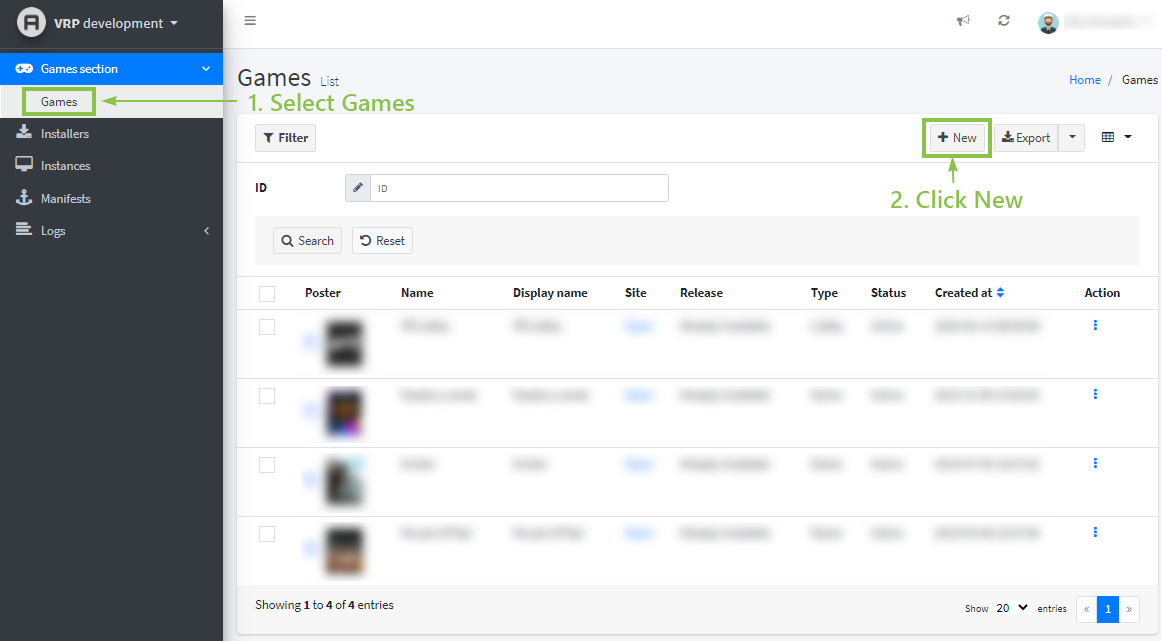
Go to the Games section – this is a list of your games. From here you can manage everything related to the game – add / change a description, manage game versions, distribute it across locations, etc. To create a new game, click New at the top right of the page.
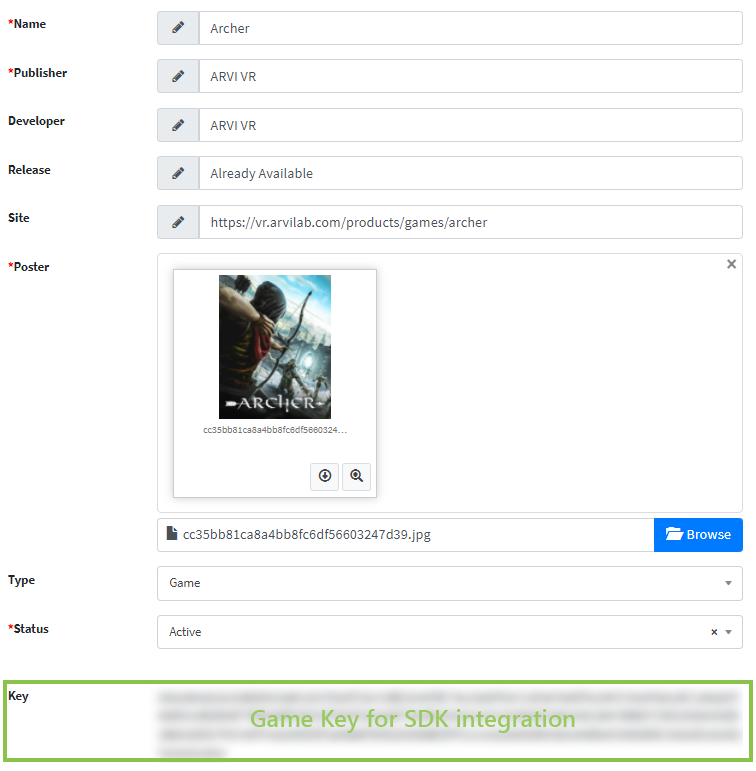
You must fill the game fields:
For example, this is how these settings look for one of our games – Archer.
Adding promotional materials
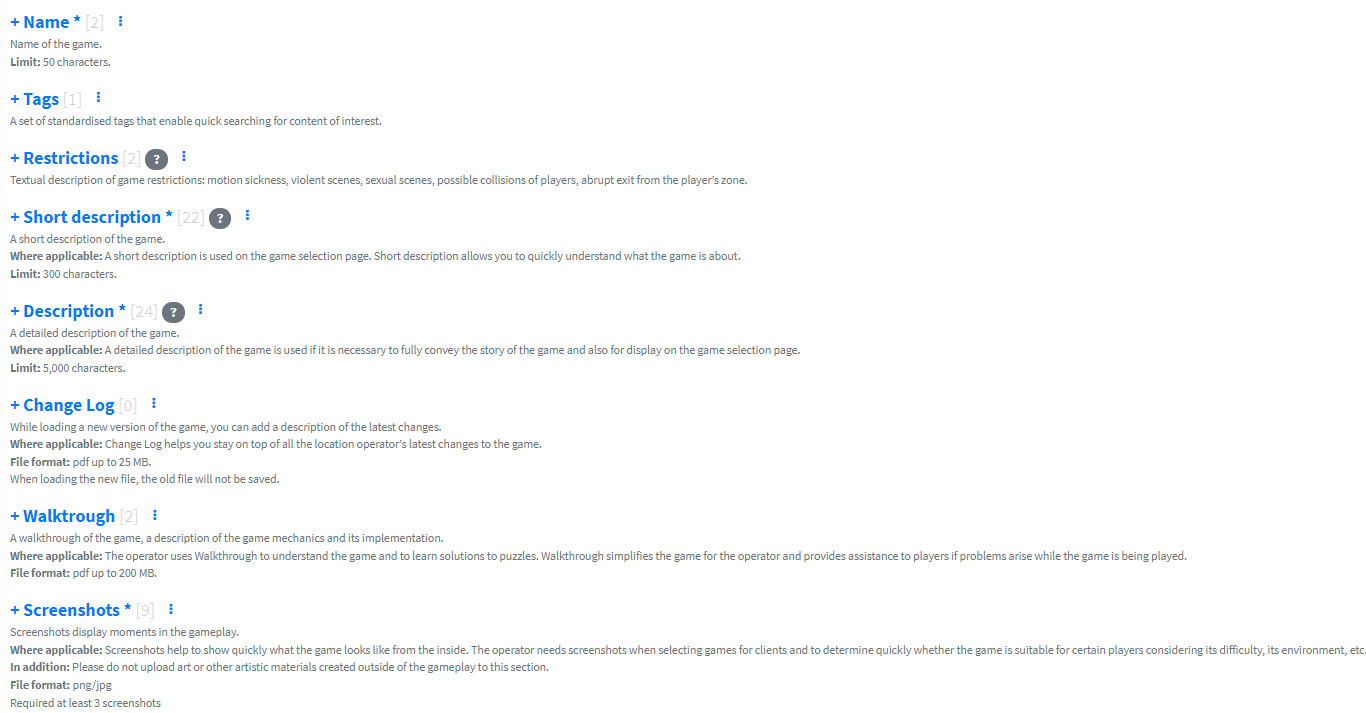
Promotional materials are used in Admin Panel to display basic information about games. Also location owners use your game posters, logos, descriptions, etc. on their websites. These materials will be used to advertise the game and display information on gaming locations.
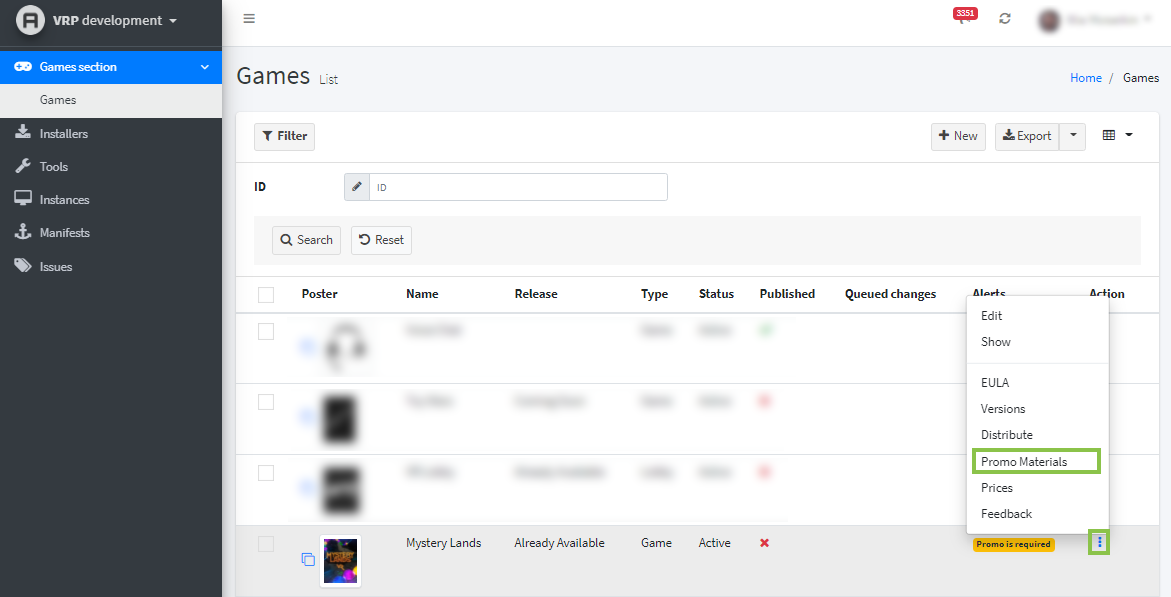
To upload promotional materials, go to the Games section and select Promo Materials from the game menu.
Fields can be filled in different languages, but English is required.
Creating game manifest
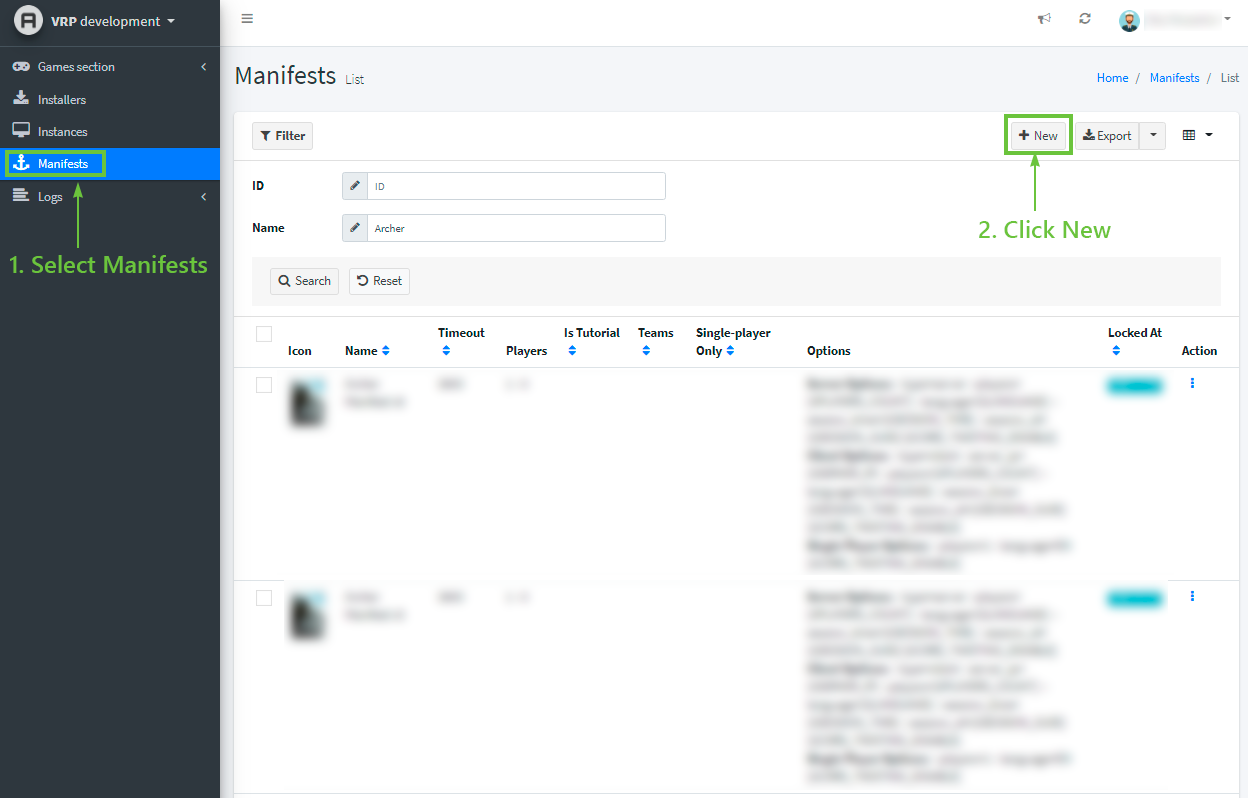
The manifest allows the platform to find out what capabilities a specific version of the game supports: with what parameters to launch it, how many players it is designed for, what localizations it supports, and much more. Each time you create a new version of your game on the platform, you will specify a manifest for it. The manifest characterizes the capabilities of a specific version of the game, not the game as a whole. For example, in the new version of the game you added support for the new localization, but previous versions do not support it. Or you decided to add new in-game commands to the game, which did not exist before. In this case, you will create a new, updated manifest for this version. Thus, a game can have multiple manifests, each describing a specific version or multiple versions. Manifests for games are stored in the Manifests section – there you can view and change existing manifests and create new ones by clicking the New button.
You must fill the manifest fields:
You can also create a manifest based on an existing one. For example, you added support for a new language, a new in-game command, or changed the launch parameters of the game. In order not to fill in all the fields again, you can duplicate the existing manifest and change the necessary settings. To do this, in the manifest menu, select Duplicate – a copy of the manifest will be created, it remains to give it a new name.

Setting up localizations
In the manifest, you can indicate which languages the game supports. This list will be displayed in the admin panel, allowing the operator to select the game session language before launching. The selected language can be retrieved by the game via SDK.
To configure localizations, select the appropriate manifest from the Manifests section and select Languages from its menu. On the page with a list of languages, check the ones that the game supports.

In-game commands
In-game commands are commands that the game provides to control the gameplay from the outside. These commands are displayed in the operator’s admin panel and enable him to control the game remotely. For example, using such commands, the operator can add game time, skip a puzzle, load a certain level, etc. The game developer himself decides what commands he is ready to provide for management, and he himself implements this in the game.
To create or edit the list of in-game commands, go to the Manifests section, select a manifest and select In-Game Commands from its menu.

In-game commands have a nested structure and looks like a menu. Root commands are at the root of the list and do not contain nested commands. Folders are also located at the root of the list and contain nested commands. The folders themselves are not commands and are only used to group the commands nested within them.
To add a root command or folder press New root command or New folder respectively.
Fill the following fields:
Field | Description |
|---|---|
Name | The name of the command / folder that will be displayed for the operator in the admin panel. |
Description | Command / folder description. |
Command Url | Command URL, used to send from the admin panel to the game. You yourself come up with this UR, it will be used when processing a command in the game. Read more about this in the SDK Integration Guide. Parameters can be passed in the common form of URL: /commandName?Param1=value1¶m2=value2. Not used when creating folders. |
Icon | Icon for displaying the command / folder in the admin panel. Recommended size is 256x256. |
Target | Indicate who you want to send the command to – the selected player, the game server, or everyone in the game. Not used when creating folders. |
Order | The number under which the command / folder will be located in the general list of commands. Both positive and negative numbers are allowed. The lower the number, the higher the command / folder will be in the list. |
Activation Message | A message that when sent from the game using the ActivateInGameCommand method (see SDK Integration Guide) activates the command / folder (or several commands, if the value of this field is the same for them), i.e. will display it in the list. The developer himself comes up with the name of this message. |
Deactivation Message | A message that, when sent from the game using the DeactivateInGameCommand method (see SDK Integration Guide), deactivates the command / folder (or several commands, if the value of this field is the same for them), i.e. will hide it in the list. The developer himself comes up with the name of this message. |
Folder actication affects the state of the commands nested in it. If the folder is deactivated, all nested commands will also be deactivated. If you activate it after that, the nested commands will return to the state in which they were before.
Commands and folders for which the Activation Message field is not specified will initially be active (i.e. displayed) in the admin panel. And vice versa – the commands for which you fill in this field will be initially disabled, and to activate them you will need to execute the ActivateInGameCommand method in the game. The same goes for folders.
UI Settings
You can add custom settings for your game, which will be displayed as controls in the admin panel when operator creates a session. Currently, you can use 3 types of controls – Checkbox, Combobox and Trackbar. To configure UI settings, select the appropriate manifest from the Manifests section and click UI Settings.

Click + button to create a new UI control.
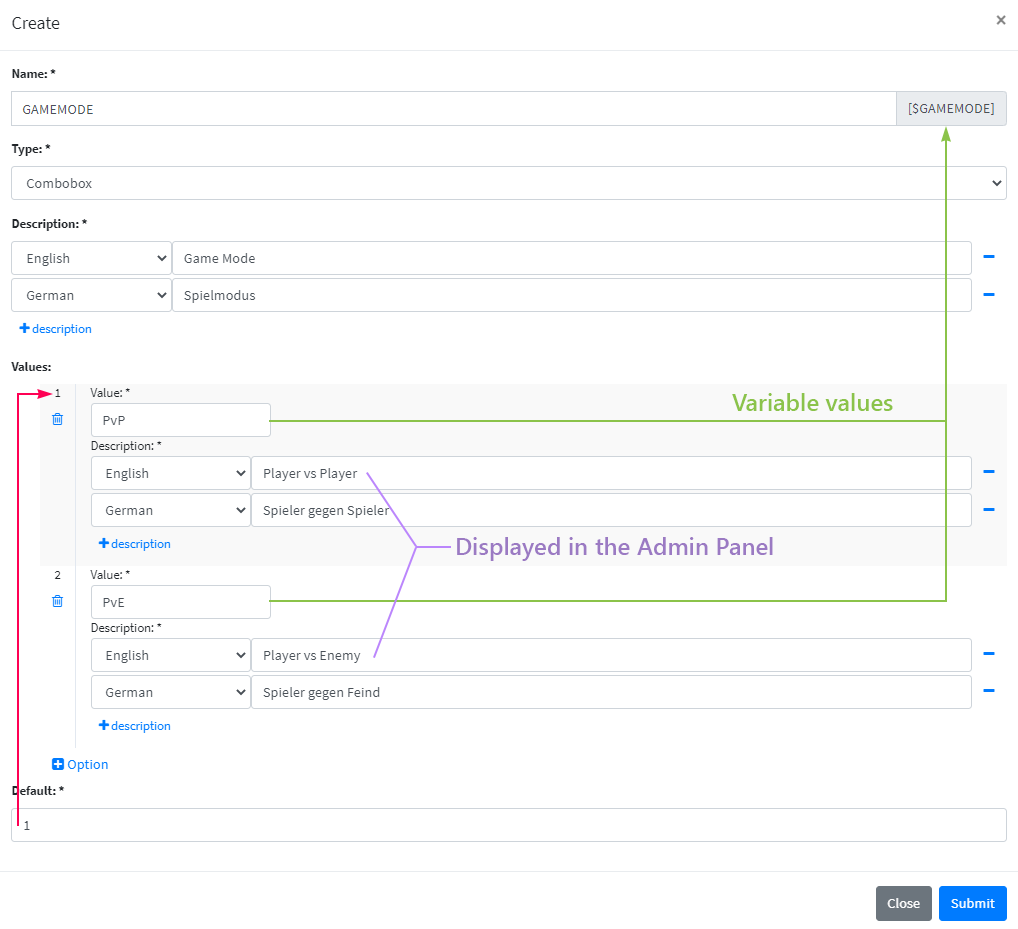
Fill the following fields if you want to create a Combobox:
Field | Description |
|---|---|
Name | The name of the control is chosen by you. Only uppercase letters. This name will be used to get the value of this control via SDK. |
Type | Select Combobox. |
Description | Text description as it will be shown in admin panel when operator creates a session. You can add descriptions for multiple languages. |
Values | Combobox items. Set the Value field with the string value that will be set in your [$CONTROL_NAME] variable. Fill the Description field with the text description (or several – for different languages) as it will be shown in admin panel. |
Default | The index of the value to be used by default. Index starts at 1. |
This example creates a Combobox named GAMEMODE. If you then use [$GAMEMODE] in Server/Client/Single Player Options like -mode=[$GAMEMODE] for example, then in the game you can read your -mode command line parameter and it’s value will be “PvP” or “PvE”.
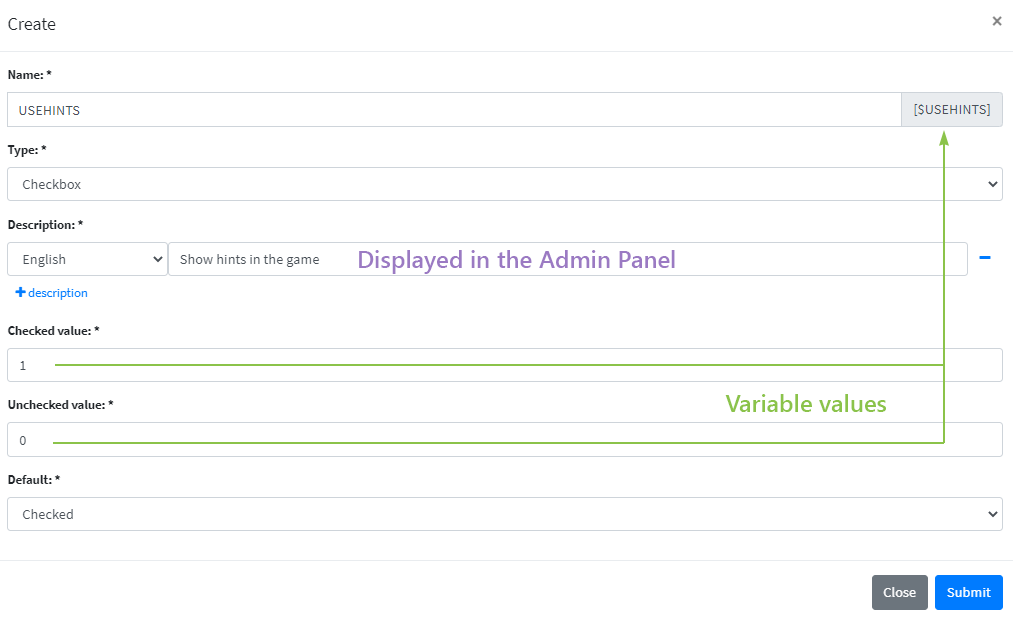
Fill the following fields if you want to create a Checkbox:
Field | Description |
|---|---|
Name | The name of the control is chosen by you. Only uppercase letters. This name will be used to get the value of this control via SDK. |
Type | Select Checkbox. |
Description | Text description as it will be shown in admin panel when operator creates a session. You can add descriptions for multiple languages. |
Checked value | String value that will be set in your [$CONTROL_NAME] variable if Checkbox state is Checked. |
Unchecked value | String value that will be set in your [$CONTROL_NAME] variable if Checkbox state is Unchecked. |
Default | Default checkbox state. |
This example creates a Checkbox named USEHINTS. If you then use [$USEHINTS] in Server/Client/Single Player Options like -hints=[$USEHINTS] for example, then in the game you can read your -hints command line parameter and it’s value will be “1” or “0”.
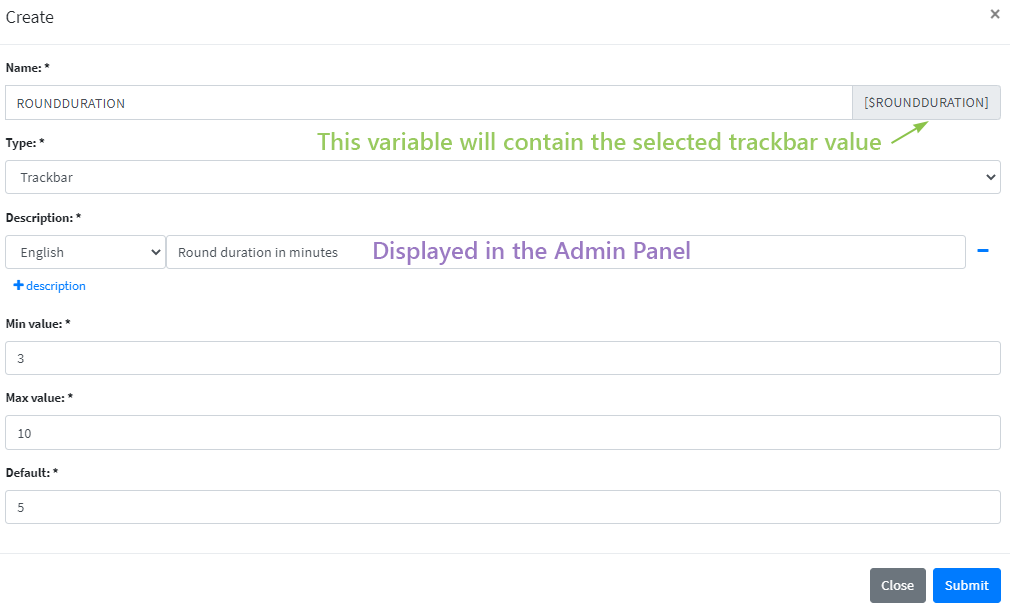
Fill the following fields if you want to create a Trackbar:
Field | Description |
|---|---|
Name | The name of the control is chosen by you. Only uppercase letters. This name will be used to get the value of this control via SDK. |
Type | Select Trackbar. |
Description | Text description as it will be shown in admin panel when operator creates a session. You can add descriptions for multiple languages. |
Min value | Minimum allowed Trackbar value. Only integer values are allowed. |
Max value | Maximum allowed Trackbar value. Only integer values are allowed. |
Default | Initial Trackbar value between Min and Max. |
This example creates a Trackbar named ROUNDDURATION. If you then use [$ROUNDDURATION] in Server/Client/Single Player Options like -round_duration=[$ROUNDDURATION] for example, then in the game you can read your -round_duration command line parameter and it’s value will be an integer value selected on Trackbar.
Creating a new game version and uploading files
After creating the game description and manifest, you need to create the first game version. You will also need to create new versions in case you want to update the game.
Signing the game executable
We strongly recommend signing the game executable with a Code Signing Certificate. Code Signing Certificates are used by software developers to digitally sign applications, drivers, executables and software programs as a way for end-users to verify that the code they receive has not been altered or compromised by a third party. They include your signature, your company’s name and, if desired, a timestamp. This will avoid possible Windows pop-ups about an unknown publisher, and also protects your executable from modifications.
You can purchase a Code Signing Certificate from many companies - Sectigo, Certum, DigiCert, GlobalSign etc. After you buy a code signing certificate, you will need to sign your game’s executable file with it.
- Download your certificate file (with .crt extension) and private key file (with .key extension) from the site where you bought the Code Signing Certificate
- Download and install OpenSSL
- Convert the .key and .crt files to a .pfx file for code signing. To do this, run the following command:
openssl.exe pkcs12 -inkey "MY_KEY_FILE.key" -in "MY_CRT_FILE.crt" -export -out mycertificate.pfxand set the password for your certificate. As a result, you will get a file that can be used to sign the game - Download and install Windows SDK
- Now you can sign your game with the following command:
"C:\Program Files (x86)\Windows Kits\10\App Certification Kit\signtool.exe" sign /tr http://timestamp.digicert.com /td sha256 /fd sha256 /a /f mycertificate.pfx /p MY_CERT_PASSWORD "my_game.exe" - Right click your file and select Properties. Check the Digital Signatures tab. Your file should be now digitally signed
Uploading the game
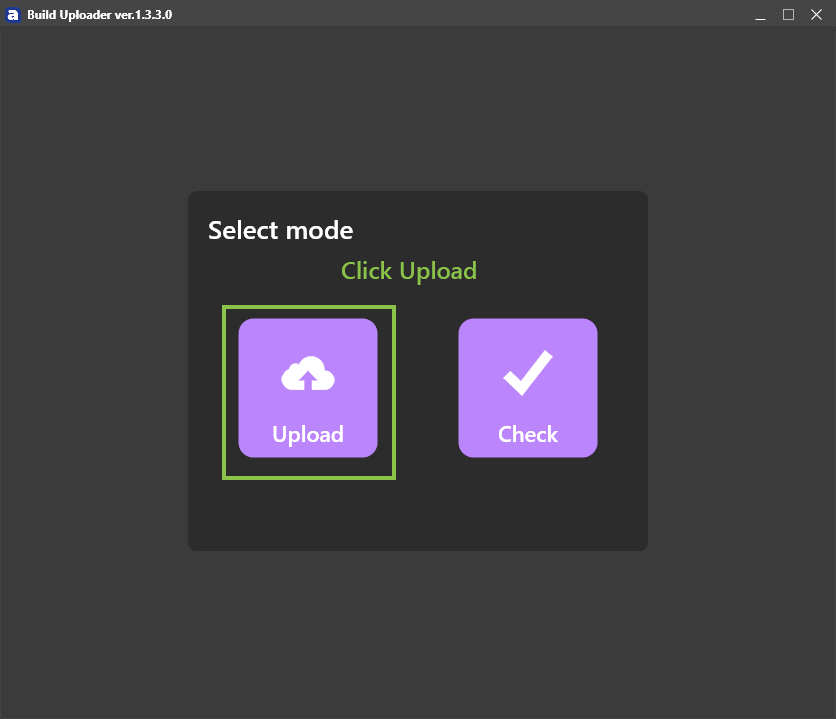
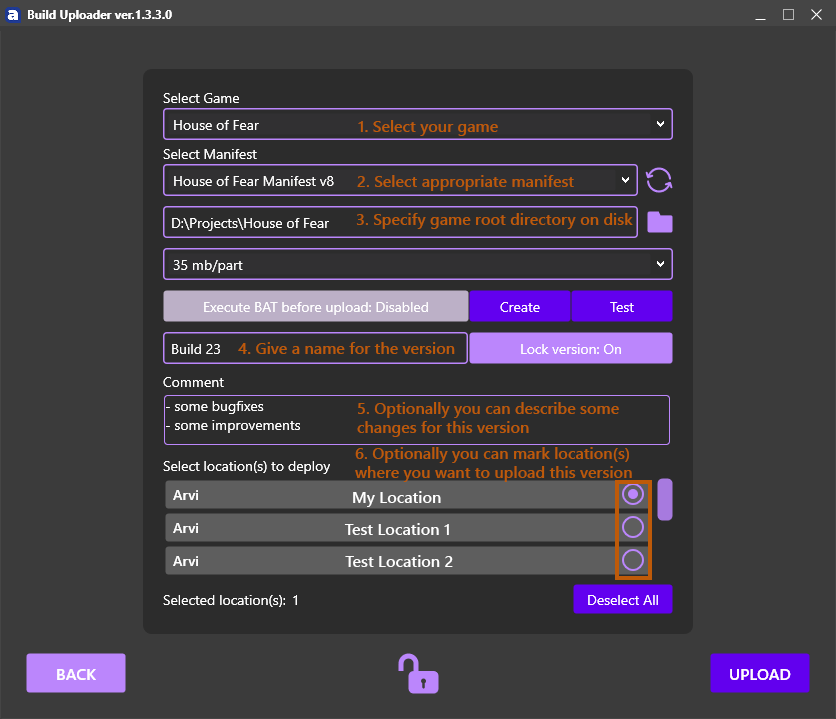
Use the Build Uploader utility for uploading your game to our platform. After its launch and authorization, select the Upload mode.
Fill all the required version fields and click Upload. Your game will be automatically packed into an archive, split into parts and uploaded to our website.
Game activation
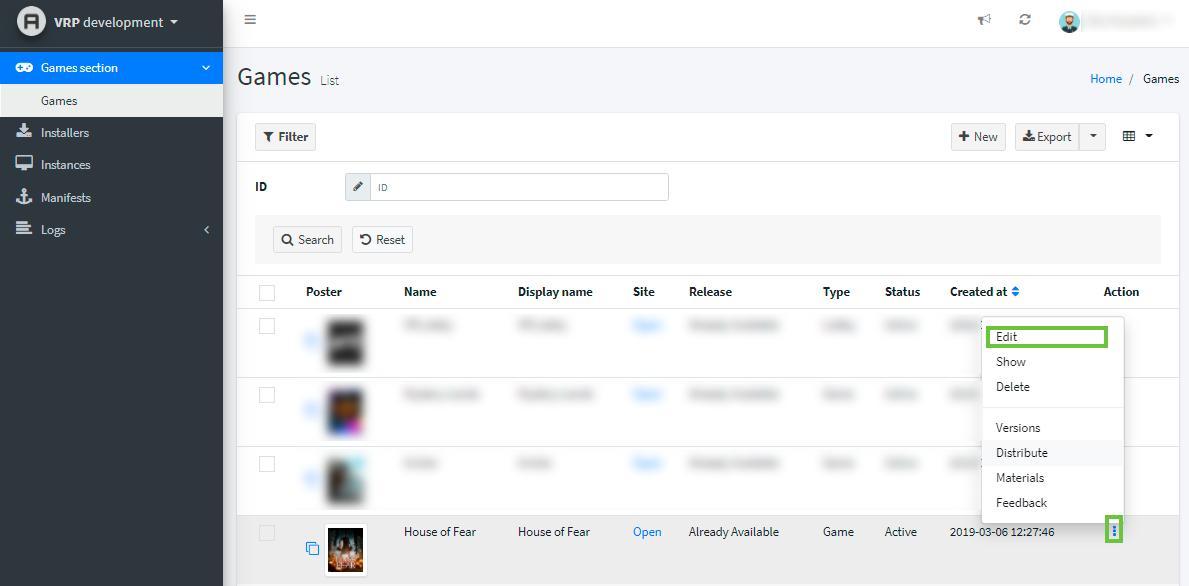
When your game is ready for release, you need to activate it. To do this, go to the Games section and select Edit in the game menu and change the Status field to Active.

Distribution by locations
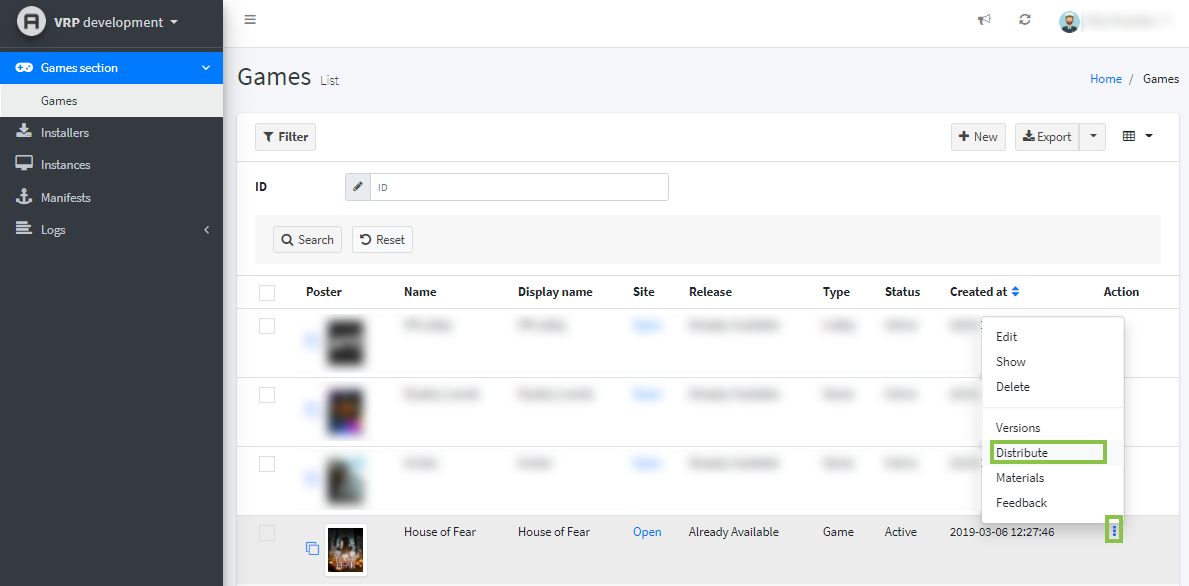
Now you can distribute your game versions between locations. For example, you can distribute a stable version to one of the locations, and a test version to another location. To do this, go to the Games section and select Distribute from the game menu.
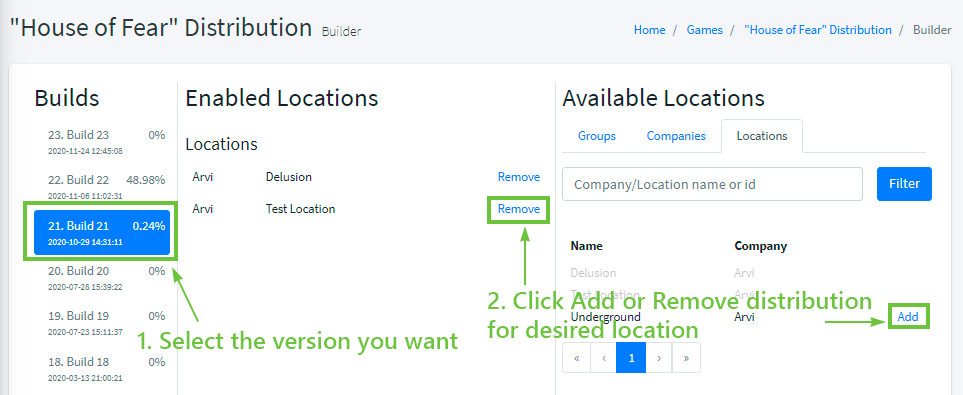
In the Builds list, select the version you want to distribute.
If you want to add this version to a specific location, in the list of Available Locations, click Add next to the one to which you want to distribute the game. Now, when the games are updated at this location, your game will be added there or updated to the selected version.
If you need to remove a version from a specific location, in the list of Enabled Locations, click Remove next to the location where you want to remove the game. The next time you update games in this location, it will be deleted.
Contact your manager or our support vr.support@arvilab.com to publish a version and distribute it to all public locations.

